

Laguna Guide Upgrade: Step-by-Step Installation
In this guide installation video, Austin Zimmerman walks you through the full installation of the Laguna 1412 Guide Kit on a Laguna 14BX bandsaw. This tutorial covers everything from removing your factory guides to precise adjustments for peak cutting performance.
3D Assembly Overviews
Lower Guide Installation
To kick off the installation, Austin first removes the blade and table from the Laguna 14BX for safe access to the lower guide set. After unplugging the machine and putting on safety glasses, he begins by unscrewing the original lower guide assembly using thumb screws. This makes room for the Black Iron lower guide upgrade, which is attached using the included socket cap bolts.
The new guide assembly offers improved durability and precise alignment. Before tightening everything down, Austin checks the depth using the eccentric dowel and side guide position to ensure everything lines up before re-installing the blade.
Upper Guide Installation
Moving on to the upper assembly, Austin shows how to remove the original guide by loosening the side screw and sliding out the dowel. The Black Iron upper guide kit may come fixed for shipping, so he recommends loosening the set screw and adjusting the eccentric shaft until the guide block lines up with the blade’s centerline.
Proper vertical alignment and backspacing behind the blade gullet are key here. Once everything is aligned and square, the upper guide is installed, secured, and ready for fine-tuning.
Guide Kit Adjustments
With both guides installed, it’s time to adjust for cutting precision. Austin tensions the blade and spins the wheels to let it fall into its natural position. Then, he adjusts both upper and lower guides for a business card’s thickness of clearance on either side of the blade.
The backup bearing is also adjusted to sit just behind the gullet, ensuring it doesn’t contact the set of the teeth. This prevents premature wear and helps the blade track straight during cutting.
The key here is minimal contact—guides should only touch the blade under light feeding pressure, not while idling. Once everything is squared, tightened, and aligned, the machine is ready for accurate and efficient sawing.
1. Why adjust the guides behind the gullet?
Placing guides just behind the gullet keeps them out of the teeth set, preventing fishtailing, blade wear, and bearing damage
2. How tight should the guides be against the blade?
Use a business card to measure spacing—guides should only touch under light cutting pressure, not during idle.
3. Do I need any special tools for this install?
4. How long does the installation typically take?
For someone familiar with their machine, installation takes about 5-10 minutes. Beginners should set aside about half an hour to go through it carefully.
5. Do I need to remove the table to install the guides?
Yes, removing the table gives you full access to the lower guide assembly and makes the process much smoother.
6. What's the benefit of upgrading to the Black Iron guide kit?
The Black Iron kit provides more robust materials, better adjustability, and longer-lasting components compared to stock guides—ideal for heavier use or tighter tolerances.
7. How do I know if my guides are too tight?
If the blade contacts the guides while turning the wheels by hand, they’re too tight. There should be no contact unless you’re feeding material.
8. Can I use this setup with resaw blades or just general-purpose blades?
Absolutely. This guide kit works with a wide range of blades, including resaw blades, as long as they fit your Laguna bandsaw.
We invite you to experience the Black Iron Parts difference – where quality parts, efficient service, and customer satisfaction are our top priorities. Contact us today for all your band saw part needs and let us be a part of your success story.
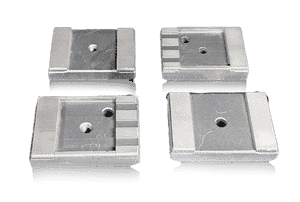
Precision-engineered bandsaw carbide guides for enhanced accuracy and efficiency in industrial operations.
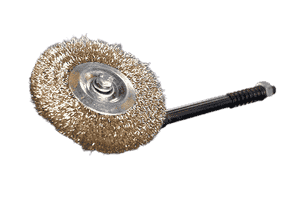
Durable chip brushes designed to maintain cleanliness and extend your bandsaw’s lifespan by effectively removing debris.

Upgrade your saw with our aluminum guides for straighter cuts, improved efficiency, and exceptional durability.

High-quality rubber and urethane band wheel tires for smoother operation of your bandsaw in any woodworking application.